Showing posts with label my patterns. Show all posts

Saturday, October 16, 2010

You Can Be a Hero Too!

So, I spoke of a tutorial on Cape Making and Marnie really wants one so I shall oblige.

A note :: These are simple enough but take a rudimentary knowledge of sewing, a sewing machine and an iron and, er, that's about it. I tend towards the picture heavy, so follow along if you please and make your little peeps or yourself something fun for All Hallow's Eve or any day of the week when you need to feel like a Hero.

(Ooooh, I feel so clever for linking back to my last post. Dork.)


You will need two fabrics, solid or print, and felt from the bolt, not those small paper size squares sold at JoAnn's (unless you want to sew more than you have to).
Be safe and get about a yard of both fabrics.
cape tutorial
I made a few with a cute print from Ikea. If you have an Ikea near, check out their children's fabric section. They sell it by the yard, it is super wide and the prices are great.

Okay, so on the measurements. I was making these production style so I tried to optimize fabric. The reason for my measurements is that a yard folded in half yields about a 22-23" bottom width of the cape .. feel free to adjustment measurements as you see fit.
cape tutorial

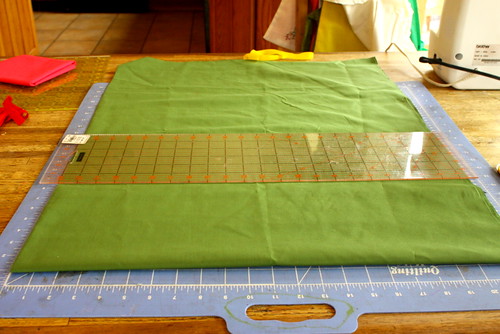
The cape length is about 24-26" long as I am sewing for very little people. Fold your fabrics in half, matching the clean selvage edges and stack them on the cutting board.
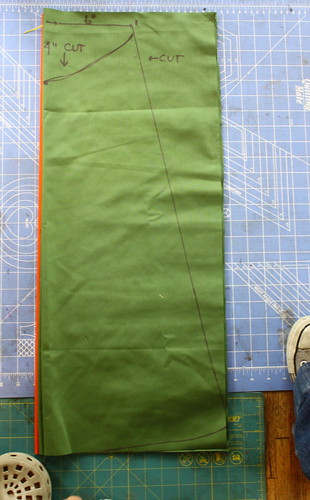
cape tutorial

I marked them for you so you can see the cutting dimensions but you should avoid marking them (especially with Sharpies because it bleeds like a mofo).

Cut along your preferred dimensions and then cut a nice little scoop for the neck area and a shallow scoop for the cape bottom.
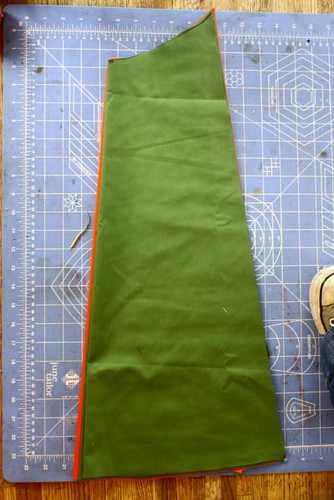
cape tutorial

Pin both fabrics together RIGHT SIDES together, very important if you are using a print fabric. Not so much if you are using solids (eh, they are 4 and do not notice things like fabric grain and side).
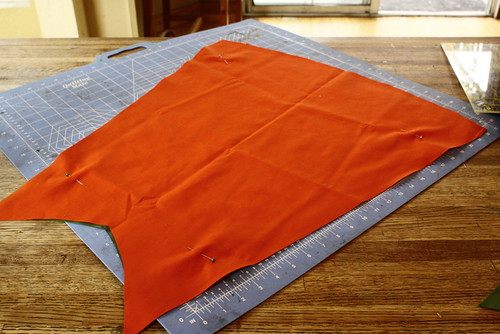
cape tutorial

(And by the way, I realize that my cheap cutting mat is horrifically dirty because it is stored on the floor and other places that it should not touch, but I did not clean it and you will just have to ignore my inattention to that detail. Okay?)

Start at the bottom of the cape and sew all the way around the cape to join the two sides (remember, RIGHT sides together) and leave a nice sized opening for your hand to fit through so that you can turn it.
cape tutorial

IRON your seams (trust me, ironing forgives many seaming sins) and turn the piece RIGHT side out and poke the corners with a knitting needles to get them fully poked out (technical term, of course). Then IRON it again until it is all nice and flat and crisp.
cape tutorial

Now, for the neck line. I used felt from the bolt. It is long and you can get a lot of mileage from it. Also it does not require seaming and bends nicely to fit the neck curve. Cut a piece about 3 inches wide and 24-26" long and fold it long ways and IRON it well.
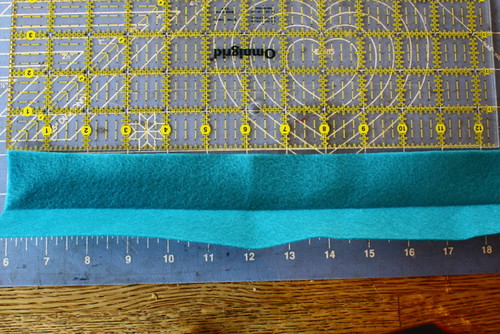
cape tutorial
cape tutorial
(God that cutting board is disgusting. Not a word, you. Not a word.)

Then fit it to your curved neckline and pin in place, then seam it from end to end making sure to catch all edges in the seam.
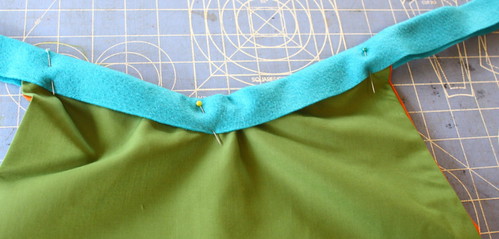
cape tutorial
Cape Tutorial

And guess what? YOU have made a simple sturdy cape for your child's pleasure. Or yours if you are going with the adult HERO theme for Halloween.
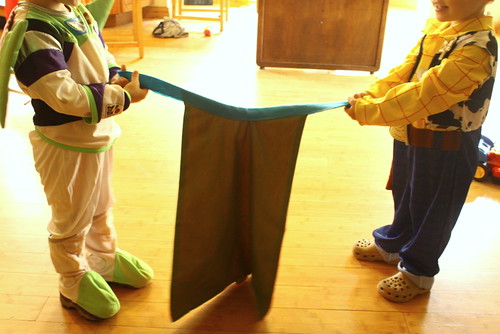
Done and Done

Cut an initial from felt and hot glue gun in place. Or use sticky Velcro. And for the neck you can tie it on or put some more Velcro at the neck closure area (so your kid does not keep asking you to tie it on .... no take it off! ... no put it back on! ... no) (you get the idea, I sure did).

JoAnn's carries a nice iron-on Velcro that I am using. And then you really are done.

And then you can make a pirate eye patch from some felt left overs and t-shirt material.
Pirate Buzz Light Year
And have the cutest Pirate Buzz Light Year who will not wear a cape because he has wings to fawn over.
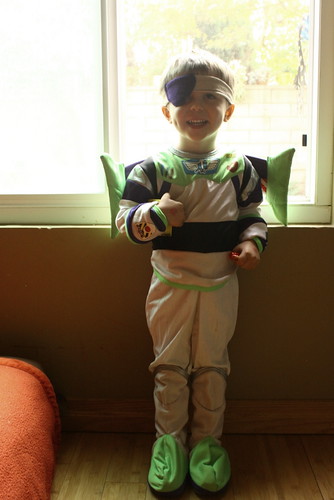
Pirate Buzz Light Year
Fini.

Sunday, December 13, 2009

On A Rainy Weekend

Our Foothills were slammed by a pretty serious rainstorm this weekend (serious for drought prone Southern California, anyway). It dovetailed nicely with our plans though as we just wanted to hole up and do nothing. A day like that was long overdue.

Normally a full day in with the boys would veer towards the unbearable, but we had PBS Saturday morning TV on our side and another secret weapon....little Legos.
Little Legos

That is a subject for a whole separate post, but let us say that the day stuck indoors was actually really lovely.

I spent a ton of time at the sewing machine with pretty specific goals set for myself. Sometimes when I want to sew, it just does not work out at all. But this weekend was a winner at the sewing table and I cranked out so many projects. It felt good as we only have a finite amount of time before we have to start handing out gifts.

The first thing I did was make some really sweet cup cozies for the boys teacher and office staff. There are only three teachers at the school, so I made one for each teacher.
Christmas Sewing :: 4 Teachers

These will be wrapped around a *Bux cup with a leetle gift card inside (those teachers sure love their *Bux). I had a great time using up long held scrap pieces. Some fabrics are too cute to throw out and this is a great way to utilize those awkward leftovers. I have to do some button sewing, but these are essentially done. The other ones are going to some loved ones that are always in need of the cozy as they are constantly drinking the coffee.

Just in case you wanted to know, it is super quick and easy. 1) Trace a open *Bux cup cozy on pattern paper. 2) Stack your fabrics as follows :: flannel for insulation, lining fabric face up, outer fabric face down. 3) Trace pattern, cut and sew around perimeter leaving about 2 inches for turning...I included a little silver elastic loop that will go around a button for closure 4) Turn piece, steam flat and top stitch all the way around. That's it.

Christmas Sewing :: 4 Teachers


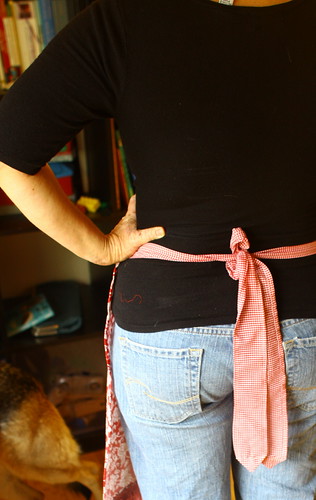
And then I still had time to crank out a few aprons. This one is the first, a special French feeling one for my brother's lady.
Apron Sewn
Apron Sewn
Apron Sewn

(I especially love the gingham ties...gingham makes me feel happy).

She is considering culinary arts as her career so I figured this will be well received. I love the fabric pairing and had a great time playing with placement of each pattern. Sewing can be so fun when it flows.

This is my sexy French cook photo...I always make the weirdest faces when Tim takes my photo, that I why most of the pictures are self shot in mirrors, much less dork factor that way.

Apron Sewn


No pattern on this one, just the basic front with darts, ruffle and waistband. I used fabric from the stash for all of these so the pattern accommodated the available yardage. I am feeling much joy at using up the fabric that hovers above my sewing table, it makes so much sense to just reach up, grab a few pieces and mix and match from there.

The one time during the day that things got a little wiggly, Tim took Mace out to the store and Owen stayed in with me. We started a project I have held to the side until now.
Train project

It is a simple little paper train scene, but turned out not to be the easiest thing with the kid. Once I figured out the fold and glue sequence and sped things up, things smoothed out. I would hand them the completed train car and they supervised the placement of the bits.
Train project

Train project


If you would have told me that my boys would play with a paper train and not destroy it, I would have laughed in your face. They took great care with it once I explained it was fragile and we actually finished the whole thing. The little tableau is set up but I will have to get back to it for final pictures.

Trains

(Snow was made from Epsom salt mixed with a touch of glitter, pretty and cheap).

Because, yep, I went back to sew some more. Ah, good rainy days. They are precious and few in the land of sun and heat.

As for today? Well, we had to get out of the house. And we did. Next post... the most beautiful of places...Noah's Ark.

BTW :: Seems like not many in blogland wanted discount birdies...was it because they were from Big Lots? You know, there is nothing wrong with bargain shopping. ;) So, LauraC, email me with your address (again) so I can send them with a holiday card. The boys will love them, when we made ours my boys carried them around carefully just like real chicks.

Thursday, December 03, 2009

Using the Hand Knits

One of the great things about cold weather (unexpectedly cold) is the opportunity to use hand knits. (I know I should have anticipated that it would be pretty damn cold at 6000 elevation in early December, but I swear I was too enamoured of the iPhone to even considering doubting it).

We always bring layers and layers for the boys just in case, but Tim and I brought hoodies as our main source of warmth. The irony was that I had pulled out this sweater for Tim to wear up there but forgot to pack it. I did happen upon a vest I had knitted early this year and packed it with the clothes going up. It seemed like a good choice as the yoke was double layer for warmth but sleeveless so I would not get too hot.
Cabin trip 09

(again with the trusting of the iPhone).

My very soft and lovely cowl was in the car, thank god, so there was some warmth in the neck area and it doubled as a great ear warmer.
Cabin trip 09


The boys each had their knits too. I planned on bringing the pair of knitted owl vests for the boys to wear with Santa, but forgot one on the chest in their room. Owen's did make it and turned out cute with a row of green buttons that he helped me pick out of the button bottle.

Cabin trip 09

It took awhile to finish this because it takes me awhile to finish anything. The last little bits of weaving in ends and sewing up armholes and finding buttons just slay me...and the piece lays in wait until I have a reason. The cold was a great reason.

For Mason, I pulled together the cutest little Wraplan sweater (Ravelry link here). I intended to knit this for a little little one, thinking that it would end up fitting a one year old. It basically fits Mace with really short sleeves. I really loved knitting this sweater, it is simple and quick, a little fussy with the neckline, but still fun.
Cabin trip 09
Cabin trip 09

The yarn is so lovely but it did not have a label when I inherited it from Kat. I know it is 100% wool because it kept Mace so warm that his cheeks turned rosy pink. It will go to a little one (gently used, now, of course) I just have to find one that is big enough.

And speaking of Kat Coyle, I read this post on her blog a few days ago.

The Red Scarf
project focuses on knitting for orphans. Since this year I am avoiding family gift knitting, I really felt compelled to start a scarf for these kids. I have some soft and chunky red yarn in the initial stage of scarf-dom. I thought I would point any interested readers in the Project's direction...you have until a December 15 deadline to knit up a simple scarf (in red) and send it their way.

It is good that there is a short season for hand knits here in California, even if we had to gain elevation to wear them. Here is hoping for a little more chill to make the season feel merry as Christmas comes (closer and closer, right?)

And just one last shot, my favorite, I think. I love how this shot caught their two personalities so well, such different boys. Mace always a little off balance and adventuresome (almost to a fault). And Owen with steady surefoot, at his brother's side, also adventuresome (almost to a fault). Ah, that pair.
Cabin trip 09

Sunday, August 02, 2009

Silhouette Stitch Shirt :: A Tutorial

I do not know what it is about the boys growing up. It is making me a sentimental mess. First I start by knitting them school vests though school is months away and we are talking two days a week, not college. And now I am making up projects that secure them to my chest, a place they never really took to until recently (ah, the explosion of toddler curiosity and my non-functioning breasts).
Silhouette Stitch Shirt

One thing I have wanted to do since having children was make shadow silhouettes. Really, it seems like one of the real perks of parenting, to freeze on paper the sweet cheeks and perfectly rounded heads and place them in a classic frame. The execution of the shadow silhouette eluded me until recently. After a failed attempt with paper on wall and a flashlight, it dawned on me that a photo would work just as well. Here is a project that developed from my desire to freeze my boys in time. Hope you enjoy it.

Shadow Silhouette Stitch Shirt
Silhouette Stitch Shirt
This project takes a few steps but I am beyond pleased with the result. Unabashedly sentimental, but sweet in its own way. It borrows heavily from my favorite book, Alabama Stitch Book.

You will need to gather a few things ::
- T Shirt
- Scrap T shirt (I used one of the boys tiny shirts)
- Tracing paper
- Freezer Paper
- Fabric Paint
- Thread and Needle

Step ONE :: Create silhouette

I took a profile picture of each of the boys then printed it as a 10x10 photo.
Silhouette Stitch Shirt
Then I traced their outline and TaDa! Instant silhouette. I used the copier at the library to shrink it to tshirt size but I hear tell there is a new fangled machine called a scanner out there. And something called Photoshop you might want to mess around with.
Silhouette Stitch Shirt

Step TWO :: Create Freezer paper template

Now, lay your freezer paper over your outline and trace the image again then cut out the outline carefully preserving curves and hair wisps etc. I use a cutting mat and straight razor to make sure the details stay clean and sharp.
Silhouette Stitch Shirt

Step THREE
:: Prep and Paint Shirt

Lay your freezer paper on you T shirt, centered and straight and iron lightly until paper adheres to shirt.
Silhouette Stitch Shirt
Apply paint to shirt, making sure to place an extra piece of paper inside the shirt to avoid bleed through of the paint. Let dry.
Silhouette Stitch Shirt

Step FOUR
:: Stitch

Cut a piece of scrap t shirt to layer behind your shadow image.
Silhouette Stitch Shirt
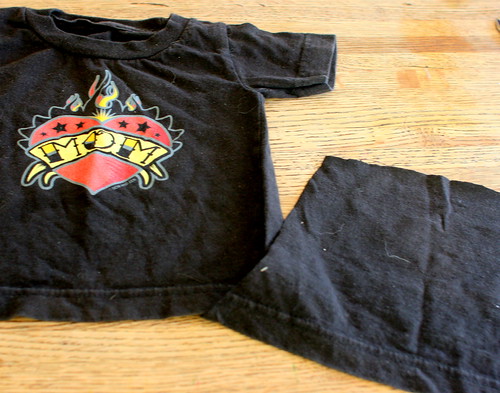
I used black on red, another nod to sentimentality as it is from one of their small worn shirts. Make sure your scrap is a bit bigger than the silhouette image.
Silhouette Stitch Shirt
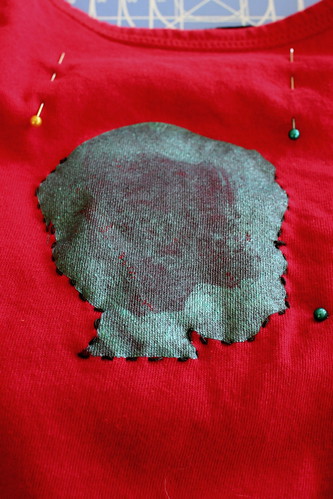
Pin scrap in place behind the painted image.

Use needle and thread to straight stitch around image. Make sure to catch both layers of tshirt in the running stitch. Also make sure to add eyelashes because baby eyelashes are essential in shadow silhouettes.
Silhouette Stitch Shirt

Step FIVE
:: Cut and Finish Shirt

Carefully cut through top layer of t shirt and cut away silhouette, leaving a thin bit of painted fabric. Be careful not to cut through backing layer, I make a cut in the center then carefully cut from there.
Silhouette Stitch Shirt
Turn shirt inside out and cut away excess backing fabric.

And there you have your own way to wear your heart on your sleeve, I mean chest.

Silhouette Stitch Shirt


I have plans to use the silhouettes for some other projects. I recommend you keep an original template just to have forever.

(You may have noticed I had to draw in Mr mace's lips. We cannot dislodge the dot from his mouth for the last few weeks. Well, we can, obviously as we are the ones in charge (guffaw) but the most terrible of whining ensues and I am just not up for it lately. So, I fudged the lips, and you can too. You have my permission. Pick your battles, that is what I say).

Friday, July 31, 2009

OWLS Vest :: Refashioned

The title of by blog testifies to my love of knitting, but knitting has been somewhat scarce round these parts lately. I thought of changing the name to Mamie Makes but that takes a lot more effort than I am willing to make. So, instead, I decided to knit a bit more than I have in the past few months.

I gave a sneak peek at a project that I completed just this week. It is a vest for Mason that I am calling his OWL Schoolboy Vest as he and his brother are headed into the great new vista of preschool come September.
OWLS Schoolboy Vest


It is technically a pattern I imagined, but it was heavily inspired by the beautiful sweater by Needled and her O W L S sweater. Initially I though I would write up the pattern to post on my sidebar, but man, pattern writing is HARD.
OWLS Schoolboy Vest


I was first moved to self design projects when I read Elizabeth Zimmerman’s Knitting Workshop. Her approach to knitting is so logical and delightful and it made designing pieces for my family fairly effortless. The execution of these projects has been fun and rewarding, I love watching an idea become a functional piece of clothing that will likely last for years.

Not so with pattern writing. What happens so organically on the needles does not translate easily to paper. I gave a go at pattern writing with my cowl because it was a tube of st-st with some easy patterning involved. This project, the vest, has quite a few components to tackle and though I have excellent pattern notes, it is so challenging to find a good way to translate them.

I may still get it down on paper and into a post of itself, but I am not sure it is really necessary. The vest idea is simple enough, the details I added can be figured out by looking at it and the OWL chart is readily available online.
My (almost) Schoolboy

I am curious to know though if you are an experienced knitter, do you see projects online or in Ravelry and think that you could do that and go about making your own refashioned project? Do you appreciate having a person write up a free pattern even if it is not multiple sized? Where do you stand on pattern writing? I am still on the fence as to whether it is something to add to my already full plate of making and fashioning.

Regardless of the pattern and its status, the finished object is one of my favorites to date. The simple cabled OWLS are perfect for a little boy, the button eyes a fun addition for little fingers to touch and count.
My (almost) Schoolboy


It is a little roomy which is always good for growing boys. And as with anything I make for them, when I see their genuine smile and the pleasure they show in the wearing…well, it just brings home that the skills I have honed in the knitting world bring so much more than a finished object.
My creation


I am thinking school is going to be a blast. Already this young man is learning to 'read' quietly to himself. And lately his drawing has taken a great leap into the world of people. Here is a pair of 'guys' in a 'school bus'. Mace's figures have such great character already. They also seem to be heavily influenced by their current obsession with "Nightmare before Christmas".
My (almost) Schoolboy

Mace's Friends
(He drew that spontaneously with no prompting from us. And he keeps drawing them. I want to take a picture of every single one. Arg. So Cute.)

Well, onward to the next vest. Owen is requesting OWLS but I have an idea for his involving a road and buttons shaped like tractors, fire trucks and school buses. And if he still insists on the OWLS marching across his chest, I think I could handle a re knit. Might even solidify my pattern and its writing. Hats off to you ladies and men that seem to crank out patterns without a blink. I have much respect for you and your efforts.